

In my last blog entry about the art deco house, I was having electrical issues and was trying to create a chandelier for the dining room. It turned out that my electrical strip had a short in it. I purchased a new one, and my lights are working!
For the chandelier,
I was really trying to create one that looked something like this: https://www.studioitalia.com.au/minneapolis-chandelier.html However,
the beads I had bought, which I thought were bugle beads, were
not. They were some weird double-barreled beads. While waiting for
my new bugle beads to get here, I experimented with them anyway, just to get a
sense of how my idea would work. This was my first try:

No. Just . .
. no. When the bugle beads arrived, I tried again. I was using
super glue to attach them to the Woodsie circle and the small plastic washer I
was using for the second tier. No matter how careful I tried to be, the
super glue made the beads all cloudy. Plus, the unevenness of the beads
made for a very funky outcome. Here is try number two:

Again, no.
For my third try, I
borrowed a tip from Emily Morganti of the Den of Slack, who had made wind chimes with bugle beads
and eye pins. I reasoned that if I could set up a series of cut-off
pins around the outside edge of my Woodsie, I had a much better chance of
getting a nice, even ring of beads. I am no good at all at figuring out
how to do the math to divide up the circle evenly, so I let Excel do it for
me. I counted the number of beads on try two, then I set up an Excel data
set, with the first column being letters of the alphabet (a through dd, to make
up the thirty rows I needed), and the second column all being the exact same
number (I chose ten; it doesn’t matter, as long as every “amount” is equal).
Then I inserted a Pie Chart based on that data set. Excel gave me a nice circle
with thirty wedges of the exact same size.
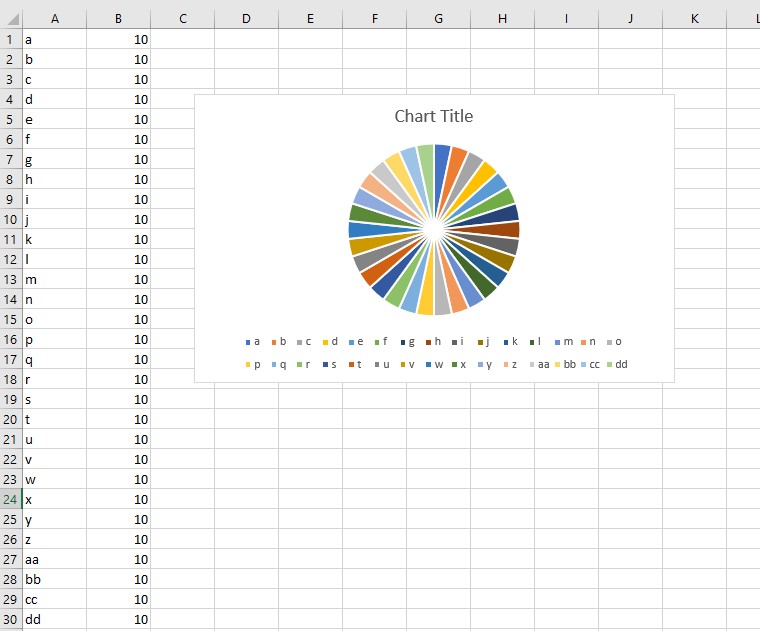
I took a screen capture of the chart, sized it to fit my Woodsie, and printed it out. I used this little chart on top my Woodsie to mark where each pin needed to go.

Drilling the holes
and clipping and inserting the pins was a ridiculously fussy process, but I
did end up with a much nicer perimeter of beads. I wasn’t able to do that
on my plastic ring washer, but I was less concerned about that set than the
outside ring. It’s a smaller ring with many fewer beads. For all, I just used Ailene’s tacky glue, and
it seemed to work fine, without the hazing. I covered the top and the
upper edge with some adhesive metal left over from making the tin ceilings in
the Orient Express. Here is try number three:

Not perfect, but
much, much better. And it lights!
Now I had lights for the dining room and kitchen (the standard half-scale globe ceiling light).


I had intended to make a similar chandelier for over the piano, but 1) it was a lot of work and 2) most of it would be hidden anyway. So I used a bead cage and a short piece of metal tubing to make a light similar to the light I had made for the Merrimack foyer. I also had the floor lamp I had made, but I was concerned there would not be enough light in the living room, so I added a ceiling fixture I had originally purchased for the bedroom. I figure I have enough time to get a replacement (which I’ve already ordered), given how slowly I’ve been working. The ceiling fixture is by LightingBug. Their lights are a little more expensive, but I love them. They are not the same old fixtures you see in every half-scale build. (They make 1:12, too.) The little ceiling fixture I bought it so pretty and delicate-looking! I think it just fits this house.

Here you can see
where I mapped out the centers of each room, drilled the holes for the lights,
and dug the channels for the wires. I glued the roof/ceiling down, and
the lights still worked!

Next, I glued down my mat board layer. (Yes, I decided to go with the mat board. I liked its thickness the best.)

I then put some spackle around the edges, sanded and painted.


The second floor
base is now glued down, and I am ready to start working on the floor. And
the lights still work. Whew!

While working on
the ceiling and electrical, I received a lovely gift from Sherrill. I had commented on how pretty her
pillows are and how interesting it was that she filled them with
pellets. She sent me four half-scale pillows, each
stuffed with a different method—pellets, pellets and fiber, seed beads, and
seed beads and fiber. I learned two things. The first is that I
think I have been overstuffing my pillows. I had stopped sewing my
pillows because the stitching always really showed, but if you don’t overstuff
your pillows, there is not as much strain on the seams, and the stitching
doesn’t show as much. The other thing is that seed beads and fiber make a
really nice stuffing for half-scale pillows. They were definitely the
best of the four, although all were nice.
One set of pillows was done in a light-gray-and-white geometric
pattern. I think they are perfect in the living room of the
Merrimack. The gray in the pillows is a lighter version of the gray in
the rug. The other set of pillows, which are the same pattern in gold and white, are going
in the art deco house.

Another wonderful addition
was, oddly, the result of Covid-19. This
year’s Kensington Dollshouse
Festival was canceled as a live show, but there was a kind of online
show. I would never be able to get
across the pond to the show in person, but I could “attend” the online
show. I clicked on the various links for
half scale and learned that one of my favorite Etsy artists has her own site
now. Life of Riley does some of
the best half-scale food I’ve ever seen. (She also does 1:12.) I have purchased from her on Etsy, but she has
a much larger selection in her own shop.
I ordered four items, which arrived quite quickly. They are all absolutely wonderful, and I never would have known if not for
Covid-19.

And there you have
it. I’m ready to start on the second
floor. I have already started cutting
floor tile using my Silhouette Cameo.
Hope everyone has a wonderful, safe week! Thanks for stopping by!
I love your chandelier! I'm definitely going to keep that method in mind for the next one I do. It's gorgeous. And they still work!
ReplyDeleteAnd I'm so excited for you. Second floor!
I so have to check out that shop.
Thanks, Sheila! I know; I'm excited for the second floor, too!
DeleteThe lughts look fabulous Deborah, and well done on the tiny chandelier. I love it. I bought the Chrysolite wedding cake candeliers to make something similar in 1:12 but have been too afraid to try! Haha! You are inspiring me to give it a go. Love all the lights on and thanks for the link for the half scale food - very handy!
ReplyDeleteThanks, Shannon! Ooh, I checked out that chandelier! It's beautiful! You should give it a try; I know you'd do a great job. Definitely check out the half-scale food. It's in the UK, so might be easier for you to get.
DeletePractice makes perfect! The chandelier looks so pretty. You’ve made great progress, it will be fun to see the 2nd floor come together.
ReplyDeleteThanks, Sherrill! It's nice to be able to move on. :-)
DeleteYou did an outstanding job on the chandelier. I love the reflection that it makes on the ceiling. Everything is shaping up nicely.
ReplyDeleteThanks, Carrie! I like the reflection, too. I didn't even notice it until after I'd taken the picture.
DeleteOh, Deborah I love your chandelier! isn't geometry just the most fickle thing ever? But always perfect when it works out - five stars for perseverance.
ReplyDeleteHave a lovely week.
Anna X
Thank you so much! I've always been very tenacious. (I prefer that to stubborn. 😉) Making miniatures has definitely taught me patience!
DeleteYour chandelier is fantastic and has given me an idea for extra lighting in one of my rooms :-)
ReplyDeleteThis comment has been removed by a blog administrator.
ReplyDeleteI like the valuable info you provide in your articles. I will bookmark your blog and check again here frequently. I am quite certain I will learn much new stuff right here! Good luck with the next! Colored Mailer Boxes
ReplyDelete