I
started with some wooden beads I had in my stash. I believe they came from Joann. Can't remember why I bought these, but I'm
sure it was because I knew they'd be good for something someday. 😊
There were various sizes in the set, so I picked out 7mm beads for my 1:12 scale ornaments and 5 mm beads for 1:24 scale.
(As
an aside, I also used one of the small oval beads for a 1:24 hat stand, so—multiple
uses! See, I knew they'd be good for
something. 😊)
Since
these beads were varnished, I did have to spend some time sanding them lightly
to remove the varnish. If you could find
plain wood beads, you wouldn't have to do this step.
I
then filled the centers with wood putty.
After
letting them dry overnight, I sanded the top and bottom to get them as smooth
as possible. It's best to give the putty
plenty of time to dry, because you're pushing it inside the bead, where air
doesn't reach it. When I tried to rush
the process, I regretted it. When I
tried to drill my holes in the next step, I ended up pushing out the entire
putty plug. 🙄
Next,
I used my pin vise and its smallest bit to drill holes in the top of each bead. These will be used for the hanging wire, but
I also inserted straight pins into the holes temporarily for easier painting.
I
painted the beads with Apple Barrel Cardinal Crimson acrylic paint. (Any flat craft paint will do. I wouldn't advise using gloss or satin,
because I don't think the nail art will stick as well.) Because red tends not to cover well, it took
a good two coats (sometimes three) to get them looking the way I wanted. During drying time, I inserted the pins into the
foam block I use for making flowers.
When
they were dry, I used some snowflake fingernail stickers (note: not water
slide decals) to decorate them.
Obviously, the nail stickers are flat and the beads are round, but the
nice thing about snowflakes is that it's easy to snip between the "arms"
to allow for better shaping of the sticker around the bead.
Once
I had the snowflakes stuck down, I used one of my ball shaping tools to really
burnish them down well.
I
then applied two coats of clear nail polish, to give them a nice shine and
really hold down the stickers.
I
took some fine brass wire and shaped it into hooks—larger hooks for the 1:12
ornaments and smaller hooks for the 1:24 ornaments.
I
glued gold tone beads (size 8 for 1:12,
size 15 for 1:24) over the holes I had
drilled, centering the hole of the bead over the hole for the wire, and glued
them down with Locktite Precision Superglue Gel. I then put a dab of the superglue gel on my hooks and inserted them in
the holes.
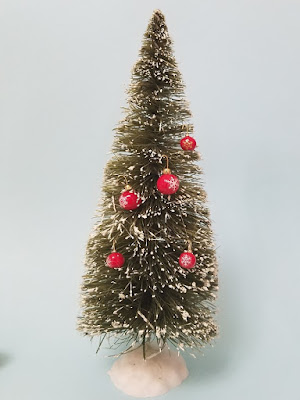
These can hang nicely on standard bottle brush trees.
Hope you enjoyed this little tutorial, and hope you all have a wonderful weekend with lots of time for your minis!


I have those beads, they have been quite versatile in my stash. Thanks for adding one more use for them. The nail stickers are a really nice detail.
ReplyDeleteThank you! I really love that bead set.
DeleteI have those beads too! I used a bunch of them on the Downtown Loft's spiral staircase spindles. They're incredibly versatile. I'll have to try the Christmas ornaments.
ReplyDeleteThank you! I think many of us were inspired by those beads. I didn't realize those were what you used on the staircase spindles. Very, very versatile!
DeleteYour Christmas ornaments are lovely and have a very Scandinavian look to them!
ReplyDeleteThank you! I hadn't thought about the Scandinavian look, but they really do. Must be my Danish and Swedish heritage coming out. 😉
DeleteThe materials you used to make these adorable ornaments worked perfectly and the nail charms are the crowning touch! I was thinking the sparkly Mod Podge would look really neat, too! Thanks for sharing your successful method!
ReplyDeleteThank you! Sparkly Mod Podge--now why didn't I think of that? And I even have some in my stash. I will need to give it a try.
DeleteBrilliant timing Deborah! I’m just starting to make some Christmas themed minis and decorating the tree is at the top of the list! Now I have a lovely tutorial to follow for tree baubles! ☺️
ReplyDeleteThanks! Looking forward to seeing your Christmas-themed minis!
Delete