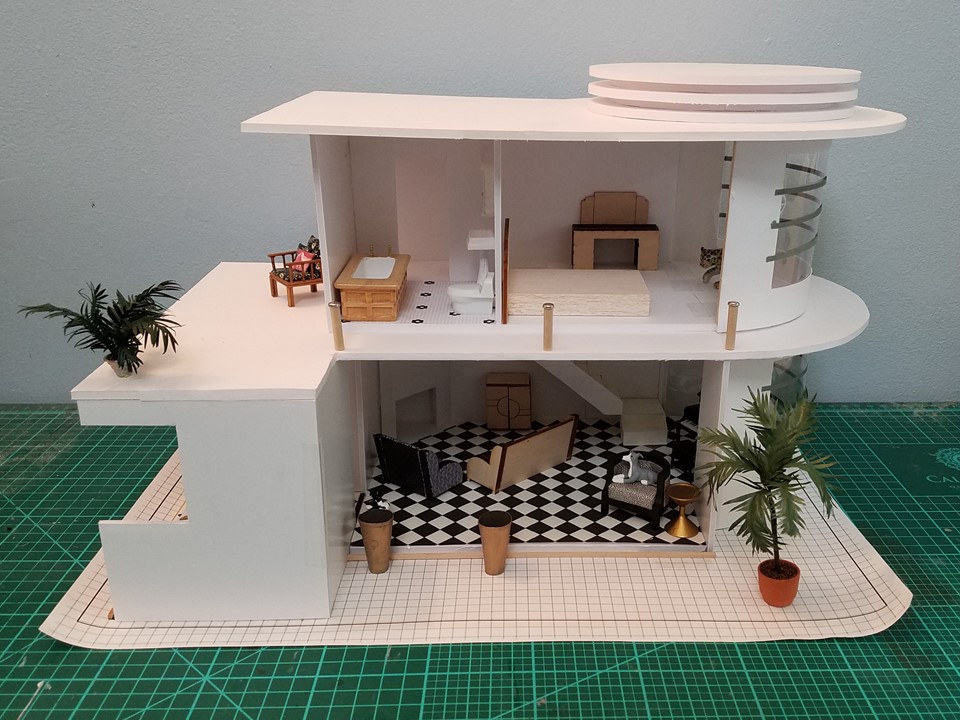
This past week, I was busy tiling the ground floor in the deco house. I have always wanted to try the tiles from dollhouse_flooring.com, and I finally had the opportunity for this build. I chose the black-and-white "Marlike" tiles; this seems like a slightly more elegant house (I like Carrie's idea that a Hollywood starlet lives here), and I liked the look of the "marble" tiles. In addition to his stand-alone Web site, he also has an Etsy store. Because my mother had given me a generous Etsy card for Christmas, I purchased on Etsy, ordering two of his "diamond" packs and two packs of the regular ½" squares. The diamond packs come with additional triangles (half squares and quarter squares) for laying out a diamond design. The tiles are very well made, and I was extremely pleased with them. While I do have some left-over tile, I used all or part of every pack.
I quickly determined that there was no layout that wouldn't require cutting some tile. *sigh* So I decided that the most important thing would be to have clean edges on the sides that open. Those are the edges that will actually be seen, and I figured that any wonky or imperfect cuts on the enclosed wall sides could be hidden by baseboard (I hope). There are two open sides—the front, which opens onto the living room, and the left side, which opens onto the kitchen and dining room. Because the flooring has to flow throughout the entire ground floor, I had to be strategic in the layout of my tile. Unfortunately, I didn't take pictures of my process, so I have made some graphical representations of what I did. They don't match my floor exactly, but you'll get the gist.
I started by using some double-sided tape to stick down a few tiles along the front (living room) edge. I laid out enough tiles to reach just above the groove for the left wall. I obviously couldn't glue them down because their positions would likely move, but the double-sided tape held them in place. I then measured to the tip of my top tile. I marked that distance in a couple of other spots along the front, then used my 18" ruler to draw a line through my marks all the way from one side of the floor to the other.

Next, I removed my tile and tape, and starting gluing down tile from the left edge. I made sure the tip of my first (white) half tile was on the line, and that the top and bottom tips of my black tiles were also on the line.

I continued laying tile from left to right, making sure that the tips of my black tiles stayed on the line.

Once I got beyond the left wall groove, I also started filling in toward the front edge. I figured if anything wasn't quite right and I had to pop loose some tiles, the fewer the better. 😊

When I had made it all the way across, I filled in the lower left side. It may look like there is a clean edge at the bottom of the left side, but in fact I had to trim the bottom edges of the half tiles just a bit, and I will likely sand or file the tips of the white tiles to ensure that the wall can fit flush against the base. Then it was just laying and cutting and laying some more. It felt like doing a jigsaw puzzle.

Cutting the tiles is not easy. Scissors or other shears don't work because they crack the top of the tile, and it takes several passes with a utility knife to get through those little suckers. When I got to the rounded edge, I looked at all those curved little bits and slivers I would have to cut and wondered whatever had possessed me to try to do a floor like this. If only I had tiles that were easier to cut! I decided to experiment.
I took a photo of a tile, sized it to ½ inch, and made several duplicates of the image. I then printed them out on double-sided matte presentation paper (which is the thickness of card stock), using my printer's "best" setting. It took some fiddling with the image settings to get the variations in the "marble" to show up properly. My white tile isn't exactly right, but it's pretty close and not obviously different once laid. Using some heavy-duty glue stick, I glued the printouts to some thin chipboard. The thickness of the double-sided presentation paper and the chipboard together were pretty darn close to the thickness of the tile. After giving them four coats of clear gloss nail polish, I decided I had something I could work with. I wouldn't use my fake tiles on the main part of the floor, but they work fine along the rounded edge, which won't be that visible and will be partially covered by baseboard anyway. The most important thing is, they are easy to cut!


And here is the finished floor, which took way longer than I had expected, but I am pleased with it. Now I'm ready to start on the walls.

On a side note, while I was doing one of my searches of the Internet for art deco inspiration, I came across this:
https://www.brainpickings.org/2018/03/21/vita-sackville-west-a-note-of-explanation-queen-marys-dollhouse/ I am not sure what enchants me most: the fact that the book was originally created as a miniature volume for Queen Mary's dollhouse; the fact that the story is about an elegant sprite who takes up residence in Queen Mary's dollhouse; or the charming period illustrations that, to a very large extent, evoke my conception of the inhabitant of the deco house. I think deep down I'd love it if the sprite came to live in my house. 😉
Have a great week! The days (in this hemisphere) are finally getting noticeably longer, and I enjoy every extra minute of daylight. Thanks for stopping by!
Have a great week! The days (in this hemisphere) are finally getting noticeably longer, and I enjoy every extra minute of daylight. Thanks for stopping by!